Spruce Up Your Space: A Beginner's Guide to Building a Wooden Plant Stand
Hey there, plant lovers and DIY enthusiasts! Are you looking to add a touch of rustic charm and functionality to your home while flexing your creative muscles? Then building your own wooden plant stand is the perfect project for you! It's surprisingly easier than you might think, and the satisfaction of displaying your greenery on a stand you crafted yourself is unbeatable. This guide will walk you through the process step-by-step, even if you've never picked up a saw before. Let's get started!
Choosing Your Materials and Tools: Getting Ready to Build
Before we dive into the construction, let's gather our supplies. The beauty of this project is its adaptability – you can adjust the design and materials to match your style and skill level.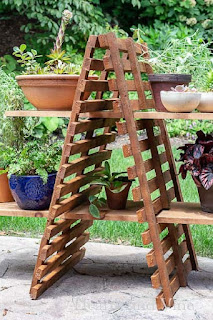
The Wood: Your Plant Stand's Foundation
For this project, I recommend using readily available and relatively inexpensive wood like pine or cedar. These are softwoods, making them easier to work with for beginners. However, hardwoods like oak or maple will create a more robust and long-lasting stand, though they'll be slightly trickier to cut and shape. Consider the overall style you're aiming for: a rustic, weathered look might suit pine better, while a more polished aesthetic could be achieved with hardwood.You'll need to decide on the dimensions of your plant stand. Think about the size of your plants, the space you have available, and the overall design you envision. A simple, tiered stand might be a good starting point. You'll probably need several boards of varying lengths and widths – sketch out a basic design beforehand to estimate your lumber needs. Remember to account for the thickness of the wood when making your measurements!
Essential Tools: Your Arsenal of Creation
Don't worry, you don't need a fully equipped workshop for this! Here's a list of the essential tools:- Measuring Tape and Pencil: Accuracy is key!
- Saw: A hand saw will work fine for smaller projects, but a circular saw will make the cuts quicker and cleaner. A jigsaw is handy for curved cuts if you're feeling adventurous.
- Sandpaper: Various grits (e.g., 80, 120, 220) for smoothing the wood. Start with a coarser grit and gradually move to finer ones for a super smooth finish.
- Drill and Drill Bits: To create pilot holes for screws and to potentially pre-drill holes for dowels.
- Screws or Wood Glue and Clamps: Screws offer a strong and quick assembly, while wood glue provides a more elegant, though slower, join. Clamps are essential for holding pieces together while the glue dries.
- Wood Stain or Paint (optional): To add color and protect the wood. Consider a sealant as well for added protection against moisture.
- Safety Glasses and Dust Mask: Protect your eyes and lungs from sawdust and wood debris.
Building Your Plant Stand: From Plans to Perfection
Now comes the fun part! The specific construction method will depend on your chosen design. Let's focus on a simple, two-tiered plant stand.Cutting the Wood: Precision is Paramount
Using your measurements and design sketch, carefully cut the wood to the required lengths and widths. Take your time with this step – accurate cuts will make assembly much easier. Remember to always use safety glasses! If you're using a circular saw, use a guide to ensure straight cuts. For more intricate shapes, a jigsaw will be your best friend.Assembling the Structure: Patience Yields Perfect Joints
Once your pieces are cut, you can start assembling your stand. For a simple two-tiered design, you might consider building two separate square or rectangular platforms of different sizes. Then, you can connect these platforms using vertical supports.Whether you're using screws or wood glue, pre-drilling pilot holes will prevent the wood from splitting. If using screws, use wood glue in conjunction for added strength and stability. If using glue, ensure proper clamping to hold the pieces securely while the glue dries completely. This usually takes several hours.


No comments:
Post a Comment